
Lately I have been experimenting with the way I present images of solar prominences and have had a few enquiries as to the method used to produce them. Here I’ll give a step by step guide to my workflow, hopefully in a way that will help you to produce similar images yourself.
Capturing the image
Obviously before you can process your images you need to capture them, as this post is more to do with processing I’ll briefly summarise the main points:
Equipment - images were taken using a Lunt LS60T Ha solar telescope, Televue 2.5x Powermate & ZWO ASI174MM mono planetary camera.
When to image - generally when imaging the sun it is best to acquire your shots at the beginning of the day rather than later as the atmosphere is generally more stable.
Image Capture - you will need to capture two images which you will blend later.
First make sure you have achieve good focus, use the solar disk for focussing and once you are happy you can start the prominence hunt.
Crank up the gain and exposure in your chosen image capture software and scan around the solar limb for likely candidates. They may be fainter than you anticipate so if you don’t see anything first time around up the gain and search a second time.
Once you have found a prominence you want to image adjust the gain and exposure so that none of the fine structure is over exposed but the main features show up well on the screen. The solar disk will be very over-exposed - don’t worry about this.
I capture around 3000 frames, it may take a little while as you will be imaging at a relatively low frame rate but this shouldn’t impact image quality. I find it is best to keep gain at around 50% and shoot at a slower frame rate as the result will be less affected by noise.
Once the prominence is captured drop the exposure time/gain so that the solar disk is correctly exposed, the prominence will likely disappear at this point. Make sure you don’t move the scope and capture around 3000 frames, this will be achieved much more quickly than the previous image.
Now you have captured your video of the prominence and solar disk you can move on to processing your image.
Processing your Images
To process the images I use AutoStakkert!2 for stacking, Registax 6 for sharpening and Photoshop Creative Cloud for final processing, I’ll take you through each step below.
Stacking & Sharpening your images

Open the video exposed for the prominence in AutoStakkert, setting the image stabilisation anchor over the prominence

Once the image has been analysed the quality graph can be used to determine the percentage of frames to stack, I have chosen 60% in this example.

Place the alignment points along the solar limb, I place additional smaller points over the prominences.

The stacked image is then opened in Registax for sharpening, I’ve not aggressively sharpened as I find over-sharpening can lead to a very artificial result

Now perform the same actions for the images exposed for the solar disk, here we are setting the alignment point prior to analysing in AutoStakkert

Set the alignment points in AutoStakkert - here I have gone for a stack of 60% of the images captured

Now we apply sharpening in Registax, once done the images are ready for processing in PhotoShop
Processing Your Sharpened Images

Once you have opened the sharpened prominence image and solar disk image, select the image of the disk and invert

While still in the inverted disk image select levels and set the mid slider in the red channel to around 1.40

Set green to around 0.79

Lastly set blue to around 0.60. You can play around with the levels of each colour channel until you find something that you like. I’m trying to reflect in a subtle way the colours seen when viewing the Sun in Hydrogen alpha.

Next copy and paste the processed disk image onto the prominence image with blending mode set to darken

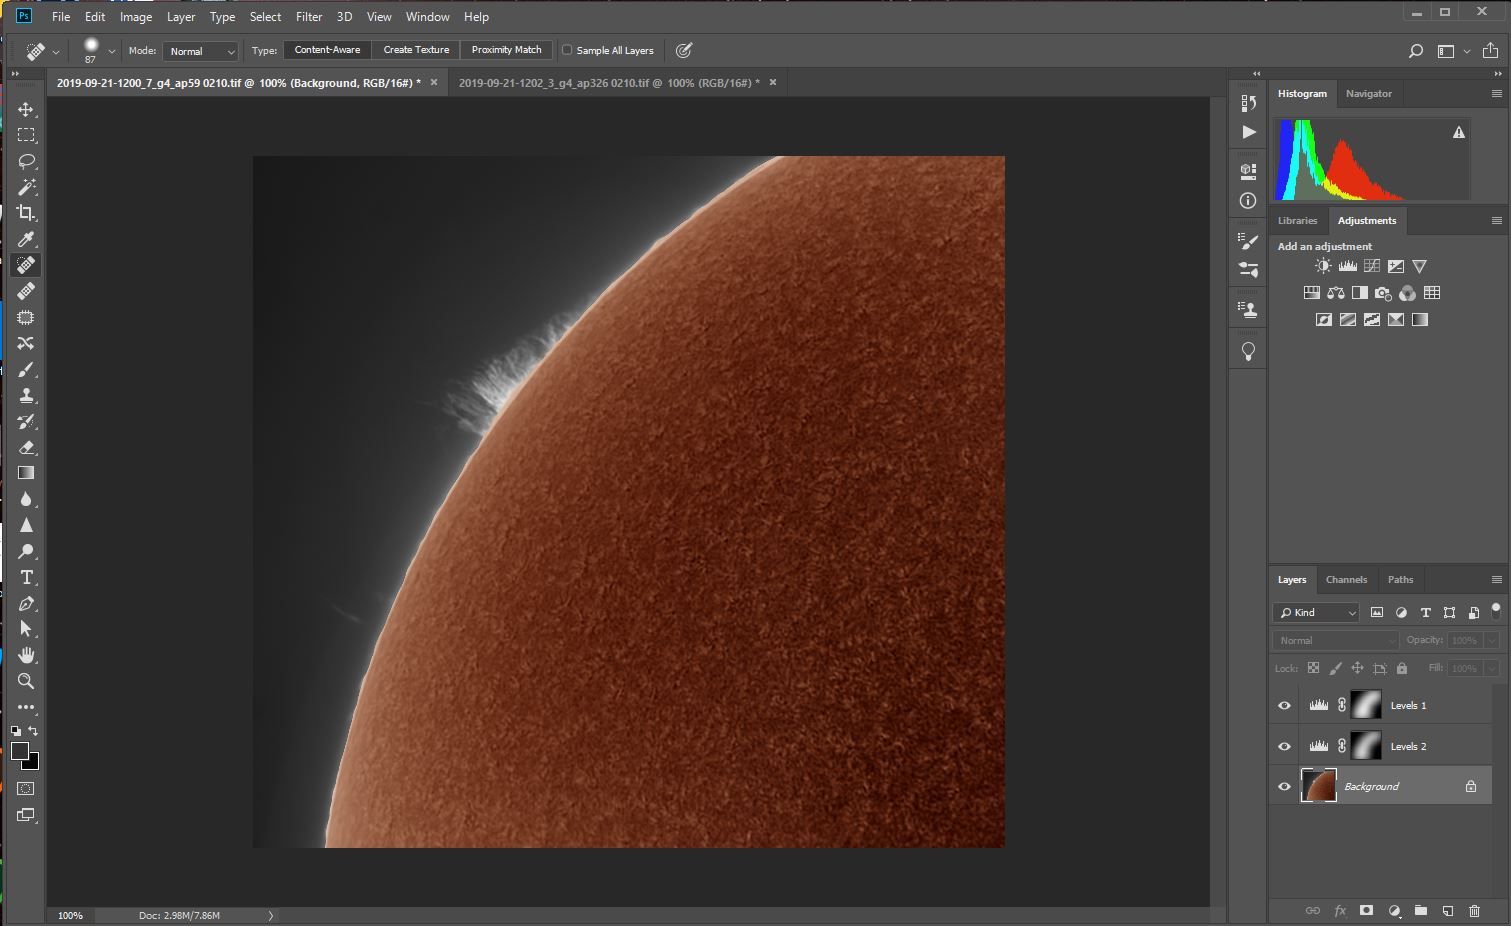
Nudge the disk until it correctly aligns to the edge of the prominence layer and adjust the levels as required on the image of the prominence (the background layer)

Crop the image so that the areas of interest in the image are best presented
Final cropped image with some adjustment of levels on the solar disk

The final result - happy solar imaging and processing!