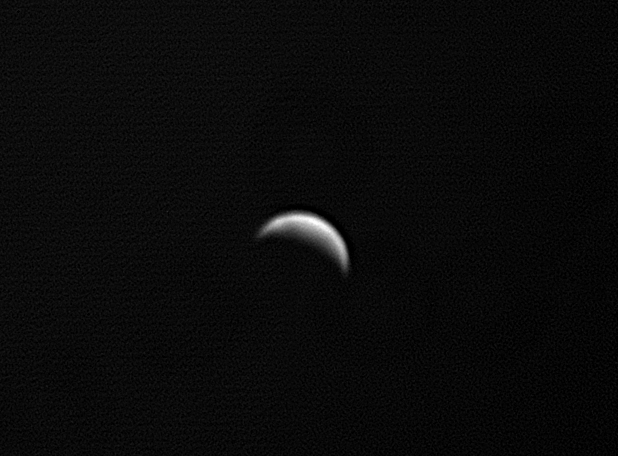
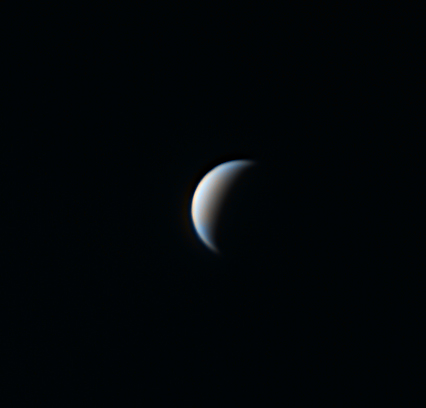
Venus is one of the most beautiful sights in the night sky, shining brightly as it hangs above the horizon at dawn or dusk. It is unquestionably a wonderful spectacle, but this low elevation presents a challenge for the astrophotographer as when an object is close to the horizon we are viewing it through a thick layer of atmosphere, conditions which rarely result in sharp images.
The fact that Venus is an inner planet (orbiting between the Sun and the Earth) means that in our skies it never strays too far from the Sun resulting in a low elevation when viewed against a dark sky, especially when it is showing a dramatic large crescent phase.
You might think this means you may as well give up on capturing decent images of our celestial evil twin but never fear, there are weapons in the astrophotography arsenal which mean we can image Venus when it is high in the daytime sky, even when at it’s closest to the Sun (inferior conjunction). In this post I’ll cover some of the techniques that hopefully will result in you producing images of Venus you will be proud of.
One very important point to mention is that you should always exercise caution when using a telescope if the Sun is above the horizon. Always keep the lens/mirror cover on when slewing the scope and NEVER look through the eyepiece if there is even a small chance that the Sun may be in the field of view.
It’s all about the Filter
The key to achieving a sharp image of Venus is to utilise the farthest regions of the visible spectrum and beyond as this will enable you to capture the planet whist the Sun is still above the horizon.
The visible light spectrum is comprised of the following colours, detailed along with the wavelengths they occupy: - Red (625 – 740nm), Orange (590 – 625nm), Yellow (565 – 590nm), Green (520 – 565nm), Cyan (500 – 520nm), Blue (435 – 500nm) & Violet (380 – 435nm).
Electromagnetic Spectrum
As I’ve mentioned in previous posts longer wavelengths of light are less affected by atmospheric turbulence (seeing). I like to think of it in terms of a huge red oil tanker cutting through the waves whereas a small blue rowing boat would be bobbing around inducing sea-sickness in its occupants. The image through a red filter may be comparatively steady while the blue filter may produce an image that appears to ‘boil’ rapidly moving in and out of focus.
IR Pass Filter
Imaging in the near infra-red helps to combat poor seeing (within reason) and also has the added bonus of increasing the contrast between the sky and the object you are imaging, in this case Venus. As shown in the diagram above the normal visible spectral bandwidth is 400 – 700nm, I use a Baader IR Pass filter which blocks the transmission of any wavelength below 670nm (deep red), just inside the visible range, with a transmission peak at 685nm.
One important point to note is that you will need to use a camera that does not have an IR Cut filter as this will block the wavelengths you are trying to capture!
Venus shot using a Baader 685nm IR Pass filter and ASI174MM camera
UV Pass Filter
To the eye Venus appears a featureless white, but if you venture to the shorter wavelengths of the electromagnetic spectrum it is possible to tease out detail within the clouds that envelop the planet. For this I employ a Baader U-Filter (Venus and UV) which allows the bandwidths 320 – 380nm to pass, peaking at 350nm and completely blocking all other wavelengths in the spectral range 200 – 1120nm. Until relatively recently this type of filter was beyond the reach of most amateur astronomers due to their high cost, now they can be picked up for around £200, within the means of most dedicated planetary imagers.
As with IR filters you need to ensure that your planetary camera is sensitive to the relevant wavelengths and as the image produced will be dim an aperture of 8” (~200mm) is recommended. It is also worth noting that some mirror coatings may affect transmission so it is worth doing a little research with respect to your particular setup prior to purchasing this type of filter.
Venus through a Baader U Filter. Much more affected by ‘seeing’ but some cloud detail is now visible
Bringing it all Together
I’ve already gone into detail on the capture and processing of planetary images in a previous post (follow link here) so won’t repeat myself here, instead I’ll concentrate on the steps required to produce a false colour rendering of Venus using the processed images captured using the IR pass and UV filters I have described above.
In Photoshop we will assign the image taken through the IR pass filter to the RED channel, the BLUE channel will use the UV filtered image, but what about GREEN? This channel will use a synthetic green comprising a 50/50 blend of the IR and UV images.
Creating a Synthetic Green Channel
Creating the synthetic green channel is very simple and outlined below:
Open your UV and IR images in PhotoShop
Select and copy the IR image (Ctrl-C, Ctrl-A)
Paste it as a layer onto the UV image (Ctrl-V)
Select the layer containing the IR image and change the opacity to 50%
Flatten the image and name accordingly
Synthetic green channel creation in PhotoShop
The resulting Synthetic green channel image is shown below.
Synthetic green channel comprised of a 50/50 blend of the IR and UV images shown previously
Creating your false colour image
Now you can bring all your images together to create the final false colour render:
Open the processed IR, UV and Synthetic Green images in Photoshop
Select one of the images, copy it and create a new file - (Ctrl-A, Ctrl-C, Ctrl-N). Make sure it is RGB colour, you can also name it at this stage - I tend to use the timestamp of the IR image and also name it something like ‘Venus IRSynGUV)
Creating a new file to save your final image into
Select each of your images in turn and paste into the correct colour channel of the new (4th) image file:
IR image to the RED channel
Synthetic Green to the GREEN channel
UV to the BLUE channel
RGB image constructed using the steps outlined above.
As a final step you may wish to copy your IR image as a luminance layer onto your final IRSynGUV image, this will generally create a crisper, brighter result. You can adjust the opacity of the luminance layer to taste and also alter the levels, rotate the image etc.Once you have completed this you should end up with a result something like that shown below.
Good luck and make sure you enjoy observing this beautiful planet.
Final IR, IR, SynG, UV image


